 You’re typing away on your laptop. Suddenly, the sound of your heater turning on distracts you. Within a few seconds, it inexplicably switches off.
While you’re trying to wrap up paperwork, the on-and-off cycle continues to distract you. Besides being an annoyance, this issue could mean that your flame sensor is malfunctioning. By learning how to test a flame sensor, you can avoid unexpected breakdowns in the middle of winter.
Quick Takeaways
- A flame sensor is responsible for verifying that the burner’s flame is working, so your home doesn’t experience a gas leak.
- If the sensor malfunctions or becomes dirty, your furnace will shut off right after it starts up.
- A multimeter can effectively test the sensor.
- When the sensor is working properly, the reading will be between 2 and 6 microamps.
- If the reading is low, you need to clean the sensor. Then, test it again. If it still doesn’t work, the sensor ought to be replaced.
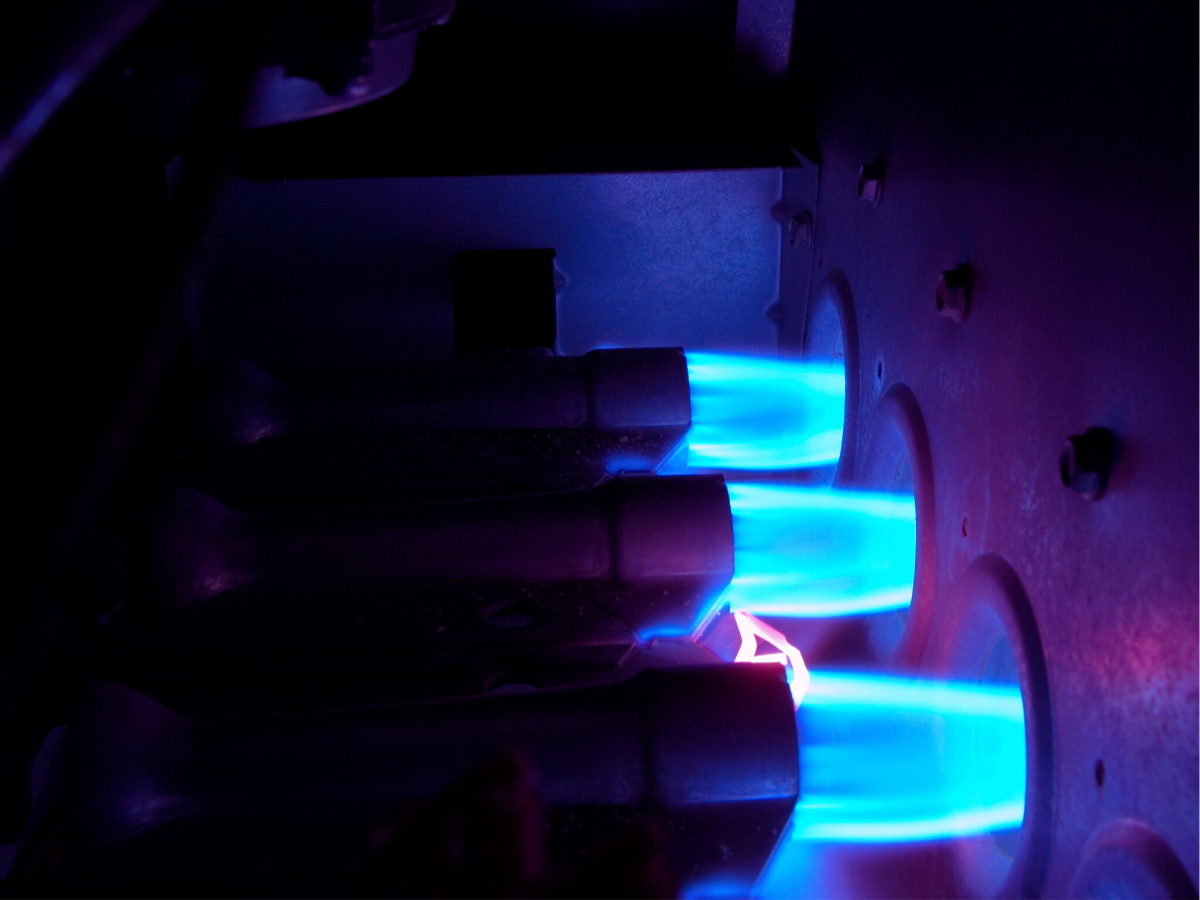
What Is a Flame Sensor?
So, what is a flame sensor? A flame sensor is basically a small metal rod that confirms that the furnace’s ignition is working properly by detecting the flame.
If there isn’t a flame, the gas valve shuts off. Soot, dirt, corrosion, and other factors can impact the sensor’s functioning capabilities.
Symptoms of a Faulty Flame Sensor
There are a few common signs when a flame sensor isn’t working properly.
- The heater ignites briefly and shuts off in 10 seconds or less.
- Your system cycles on and off without actually heating your home.
- The sensor rod has visible corrosion or soot on it.
- An LED error code says that no flame is detected.
- The heater provides inconsistent heat.
- Your utility bills have skyrocketed for no apparent reason.
How To Test a Flame Sensor
 To ensure your family’s safety, it pays to be proactive about testing your flame sensor.
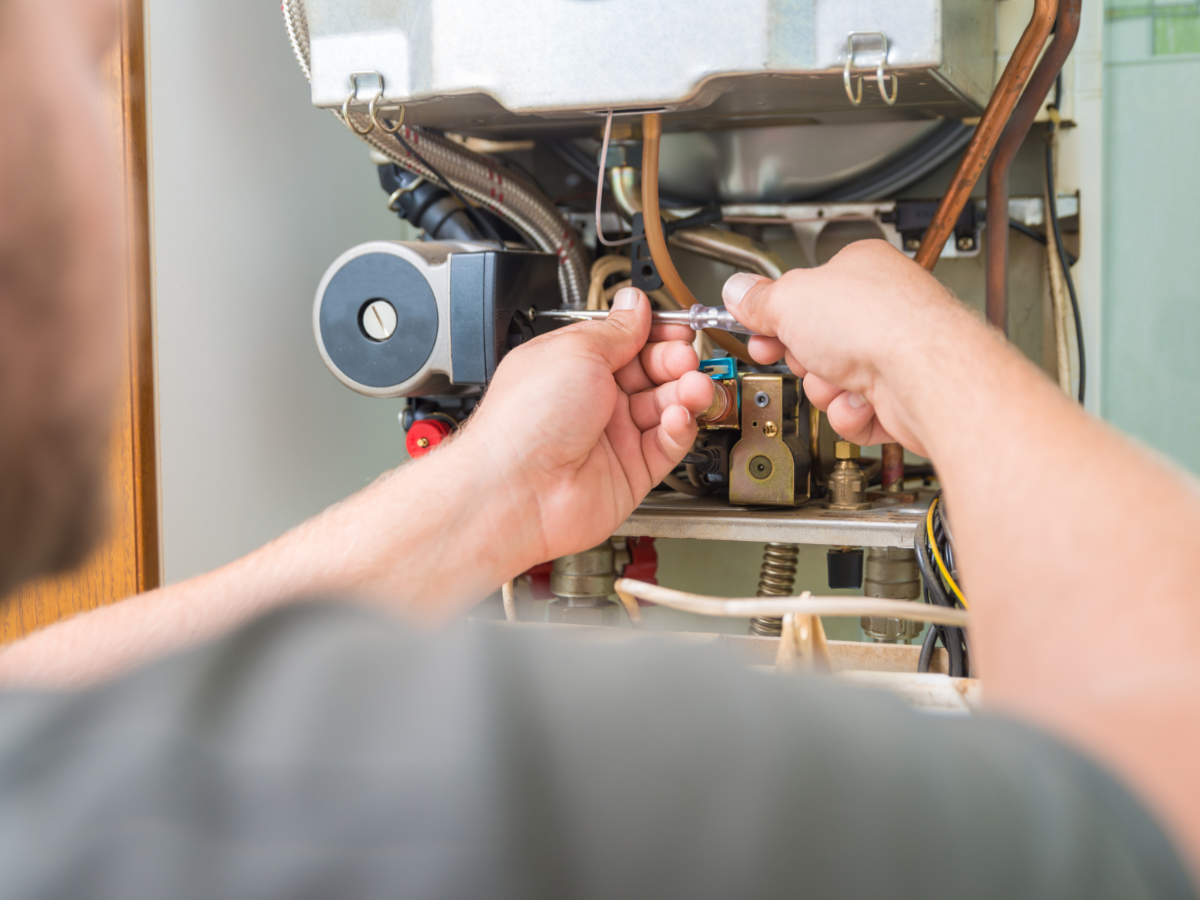
Step 1: Turn Off the Power and Gas
For your safety, you should always handle gas components with caution. Make sure the furnace is turned off at the gas valve and breaker. Then, wait several minutes for the system to cool.
Step 2: Locate the Flame Sensor
The flame sensor is normally near the pilot light or burner assembly. It will look like a thin metal rod, and there should be a wire connected to it.
Step 3: Disconnect the Sensor Wire
With great care, remove the wire from the sensor terminal.
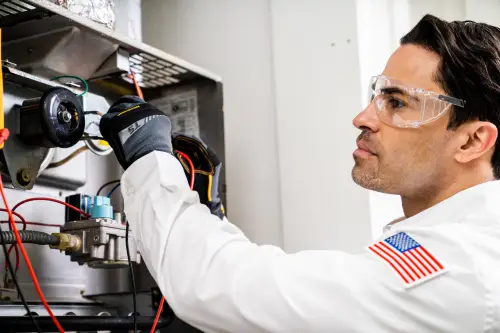
Step 4: Set Up Your Multimeter
Prepare your multimeter to test the sensor by setting it to DC microamps mode.
Step 5: Connect the Multimeter Leads
Connect one of the leads to the sensor wire. The other should be linked to the terminal. Turn your furnace back on.
Step 6: Interpret Your Results
As the heating cycle begins, check the reading. It should be between 2 and 6. If it is below this, the sensor is dirty or damaged in some way.
Step 7: Clean or Replace the Flame Sensor
You should turn off the power again to clean the flame sensor. Unscrew it so that you can remove it. With an emery cloth or fine steel wool, gently clean the rod.
You should never use abrasive sanding materials because these can harm the coating. Once it is cleaned, you can reinstall the rod and test it again.
What To Do If the Flame Sensor Fails the Test
If cleaning doesn’t fix the problem, the sensor may be worn or cracked. You can check the mounting bracket and wiring to see if they are corroded.
Then, you can check the model number to buy a replacement sensor. If a replacement doesn’t work, there is likely a deeper issue with your gas valve, control board, or ignition system.
How Often To Test or Clean a Flame Sensor
 For the best results, you should get your flame sensor inspected each year during your fall maintenance appointment. While we recommend cleaning it every 6 to 12 months, you may need to do this more frequently if you have a particularly dusty home. Additionally, we recommend replacing the sensor every three to five years if your readings are inaccurate.
Safety Tips When Testing Flame Sensors
Whenever you are testing your flame sensor, you should always shut off the power and gas lines. If there are any scorch marks or gas odors, immediately stop and call a professional. Additionally, don’t disable the safety sensors.
FAQs About Flame Sensors
Over time, our team has fielded a few common questions about flame sensors.
What’s considered a normal reading on a flame sensor?
During ignition, the reading should generally be between 2 and 6 microamps.
Can I test a flame sensor without a multimeter?
You can observe potential problems and clean the flame sensor. However, you won’t be able to test it accurately if you don’t have a multimeter on hand.
How do I know if my flame sensor is bad or dirty?
You can troubleshoot by cleaning the sensor. If the performance improves afterward, it was dirty. A lack of improvement likely means that the sensor has failed.
Is it safe to clean a flame sensor myself?
If you follow the instructions carefully and shut off the system, you can clean it safely.
What happens if I ignore a bad flame sensor?
Ignoring a bad sensor can lead your furnace to shut off frequently, resulting in higher bills. It may also fail entirely and leave your family without heat during the coldest nights of the year.
Need Help Testing or Replacing a Flame Sensor?
![]() Are you struggling with a heater that keeps shutting down? Give our Tampa HVAC technicians a call today! We’ll test, clean, or replace your flame sensor, so your family can enjoy a warm, comfortable winter.
Are you struggling with a heater that keeps shutting down? Give our Tampa HVAC technicians a call today! We’ll test, clean, or replace your flame sensor, so your family can enjoy a warm, comfortable winter.
We’re always on time, or you don’t pay a dime!